

Homemade gifts can be cool and fun. And many are more special to the recipient than a store-bought gift. I've scoured the internet for my 30 favorite DIY gifts for kids. Check them out, I think you'll find something for every kid on your list!
1. This latches board is beautiful and would stand the test of time.
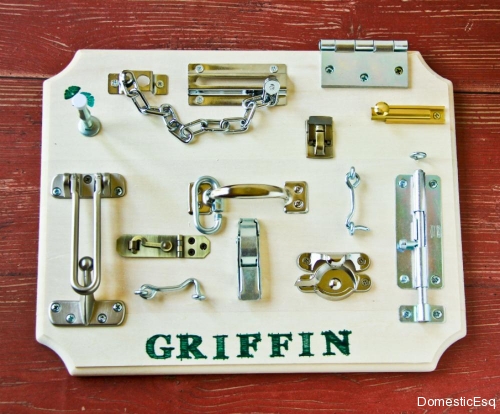 |
| Via Domesticesq |
2. Doesn't every baby need a taggies pillow?
 |
| Via Chez Beeper Bebe |
3. And these sock sheep are so sweet.
 |
| Via Craft Passion |
4. But this octopus (via Red Ted Art) made from kids tights is even sweeter.
5. This dress-up doll looks like a great car toy.
 |
| Via Cut, Craft, Create |
6. This is a tutorial for a beautiful cloth doll.
 |
| Via Wagner |
7. My kids adore their play food, it's so much fun. Here's a whole garden full!
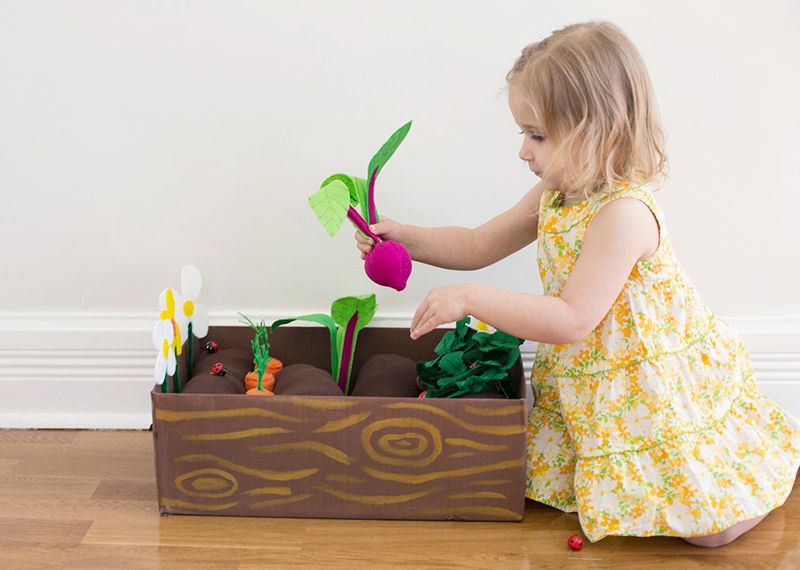 |
| Via A Beautiful Mess |
8. These dino tails look like so much fun.
 |
| Via Running with Scissors |
9. I absolutely adore this DIY fishing game.
 |
| Via Make It-Love It |
10. I always wonder what to do with all those mismatched sheets...forts!
11. There's no need to spend $150 on that particleboard dollhouse when you have an old dresser. And if you're using it for Barbies just take out a shelf or two.
12. Lip balm is so easy with this DIY kit. Flavor or color it with your recipient's favorites.
 |
| Via Rogue Naturals |
13. Gotta love old dressers, here's a super easy sweet little dress up closet.
 |
| Via A Turtle's Life for Me |
14. I was shocked when I saw how long stick horses kept my kids entertained at Grandma's house!
 |
| Via A Beautiful Mess |
15. This gorgeous puppet theater is great for a bit more advanced project...
 |
| Via Adventure In A Box |
16. I love these DIY superhero dress-up outfits.
 |
| Via Chiot's Run |
17. And more cute felt dress-up items...
18. I might just learn to crochet so I can make this ADORABLE hooded cowl.
 |
| Via The Velvet Acorn |
19. What kid doesn't love a bean bag?
 |
| Via 2 Little Superheroes |
20. This mom made a Lego table out of an Ikea Trofast. I think I'm going to flip over the top piece of my kids' train table and glue Lego baseplates to it. *Smh how have I not already thought of this?!*
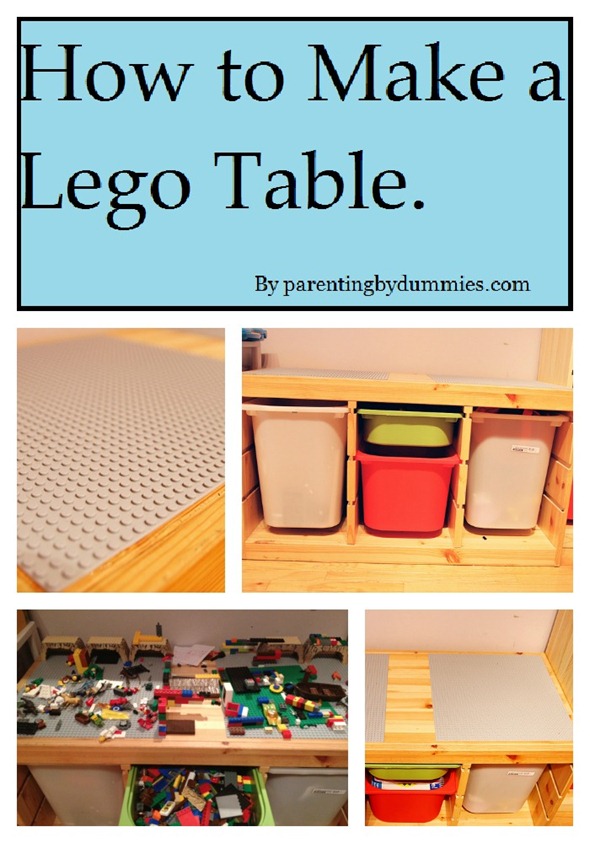 |
| Via Dude Mom |
21. These paper alphabet blocks are darling, or you could paint your own with some plain wood letters.
 |
| Via Digitprop |
22. Do you have a skateboarder, surfer, or snowboarder in the family? Here's a board cool sling.
 |
| Via Kojo Designs |
23. And the always useful pillow-fight sheild.
 |
| Via Busily Spinning Momma |
24. Put together this easy doctor playset with a few things you have around the house and a real stethoscope.
 |
| Via My Poppet |
25. They will think you're the coolest person ever if you make these fun monster mittens, no knitting required.
 |
| Via Martha Stewart |
26. Those 18" doll accessories can be pricey. Build this gorgeous doll bunk bed with this really simple tutorial.
 |
| Via Ana White |
27. I don't know a tween who wouldn't love this awesome hammock chair.
 |
| A Beautiful Mess |
28. Here are 10 fun DIY gifts for young girls...
29. This Lego belt is very cool.
 |
| Via Delia Creates |
30. Teenage boys would love these DIY paracord bracelets, you could even hide "survival" items in them like this one.
 |
| Via A Girl and a Gluegun |
Like this list? Check out my 10 easy tips for having a simpler, less expensive, less commercialized, but just as fun Christmas!


